
DIY: Personalized Holiday Mugs
The holiday season is already here, which usually means rushed, last-minute holiday shopping. But store-bought gifts can be pricey, and they do not always make the perfect gift. If you don’t know what to get someone, take the better route: do it yourself! And what better gift can you give than a personalized mug?
You may not be the most artistic person out there, but this craft is perfect for beginners and experts alike. The best thing about these mugs is that you can make a lot at once and decorate them to your liking. As long as you can hold a pen, you can do this!
You will need:
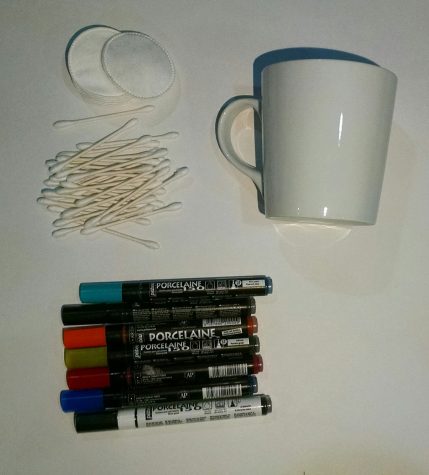
A Mug
When buying a mug, get the inexpensive ones. Not only do they save you money, but the less pricey mugs usually have a thinner glaze on them. This will help your artwork hold to the mug better and survive dishwashing.
Of course, avoid mugs that are already decorated. The mugs in the images shown cost about a dollar each from Crate & Barrel and IKEA. Make sure the mugs are oven safe.
Porcelain Pens
Porcelain pens are like markers (depending on the thickness you use). The type I use are Pebeo 150 Porcelain Pens. These markers withstand dishwashing well and make for a long-lasting design. However, they cost around $8 each, so they are a bit expensive. For outlining, I use a .7 mm pen, but the rest of the pens are 1.2mm.
If you don’t want to invest, you can use Sharpies instead. Sharpies will work on thin-glazed mugs, but the finished products tend to be finicky and do not tolerate too much scrubbing. In my personal experience, these mugs don’t last very long and are best carefully hand washed.
Rubbing Alcohol and Q-tips/Cotton Pads
For erasing mistakes.
Setting Up:
Before you begin, set up either a newspaper or something else you can write on. Also, work in a well ventilated area, because rubbing alcohol fumes are toxic.
Drawing:
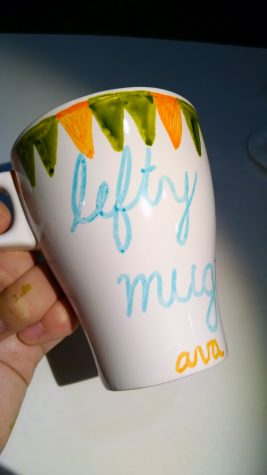
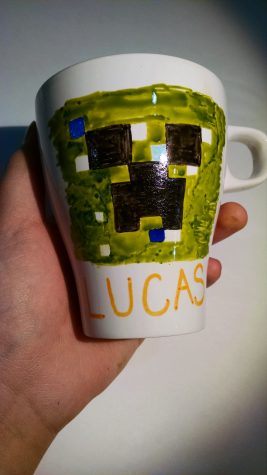
Create a design beforehand! The basic concept of this craft is using the Porcelain Pens to draw on a mug that you can actually use. (This craft works on all other porcelain ware, so feel free to experiment.) You can erase the ink with rubbing alcohol and a Q-tip. Don’t choose a design that is too complicated for your first mug. Also, note that colors come out a shade darker after baking.
Feel free to borrow any of the designs shown in this article!
Baking:
Once your drawing is complete, let it dry for at least 24 hours. Some pens say that they can air-dry on porcelain, but the best way to ensure longevity is by baking the ink. The paint will set in the oven (as if you’re firing painted pottery in a kiln), so the mugs will be dishwasher safe afterward.
Follow the directions on your pens. If you’re using Sharpies, 300 ℉ for 35 minutes should be sufficient. Porcelain can sometimes crack when heated. To avoid this, put the mugs in the oven while it is preheating. This will let them heat up slowly instead of going into shock. Start timing the 35 minutes (or whichever time is specified by your pens) when the oven hits the right temperature.
IMPORTANT NOTE: Mugs sometimes have sticky labels on the bottom. Please, REMEMBER TO REMOVE THE LABELS before you put your mugs in the hot oven. These labels are FLAMMABLE.
When the mugs are done, turn off the oven and take your mugs out carefully (they are hot!). Place them on a thick cloth or on your stovetop. Give them time to cool, and they should be all ready for gifting this holiday!
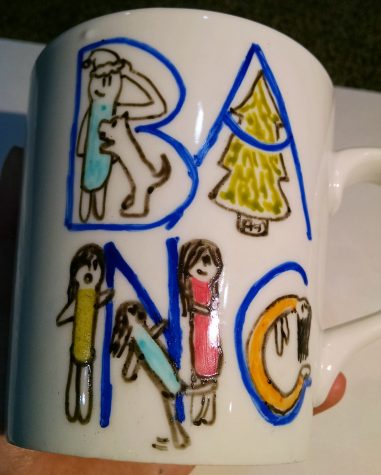
Here is a step-by-step of how I made the BANG mug.
I made this mug last year, and the drawing is still intact after multiple washings.
Using my thin tipped pen, I started drawing my dad. I did NOT free-draw this. I sketched it out and perfected it beforehand.

Notice how simple and clean the drawing is. Since the ink difficult to erase with precision, make sure the design is carefully planned out beforehand.
If you are struggling with holding your mug without creating huge smudges over the surface, try putting the mug upside-down over your non-dominant hand. Unless you have an enormous mug, it should be steady enough for you to draw this way.
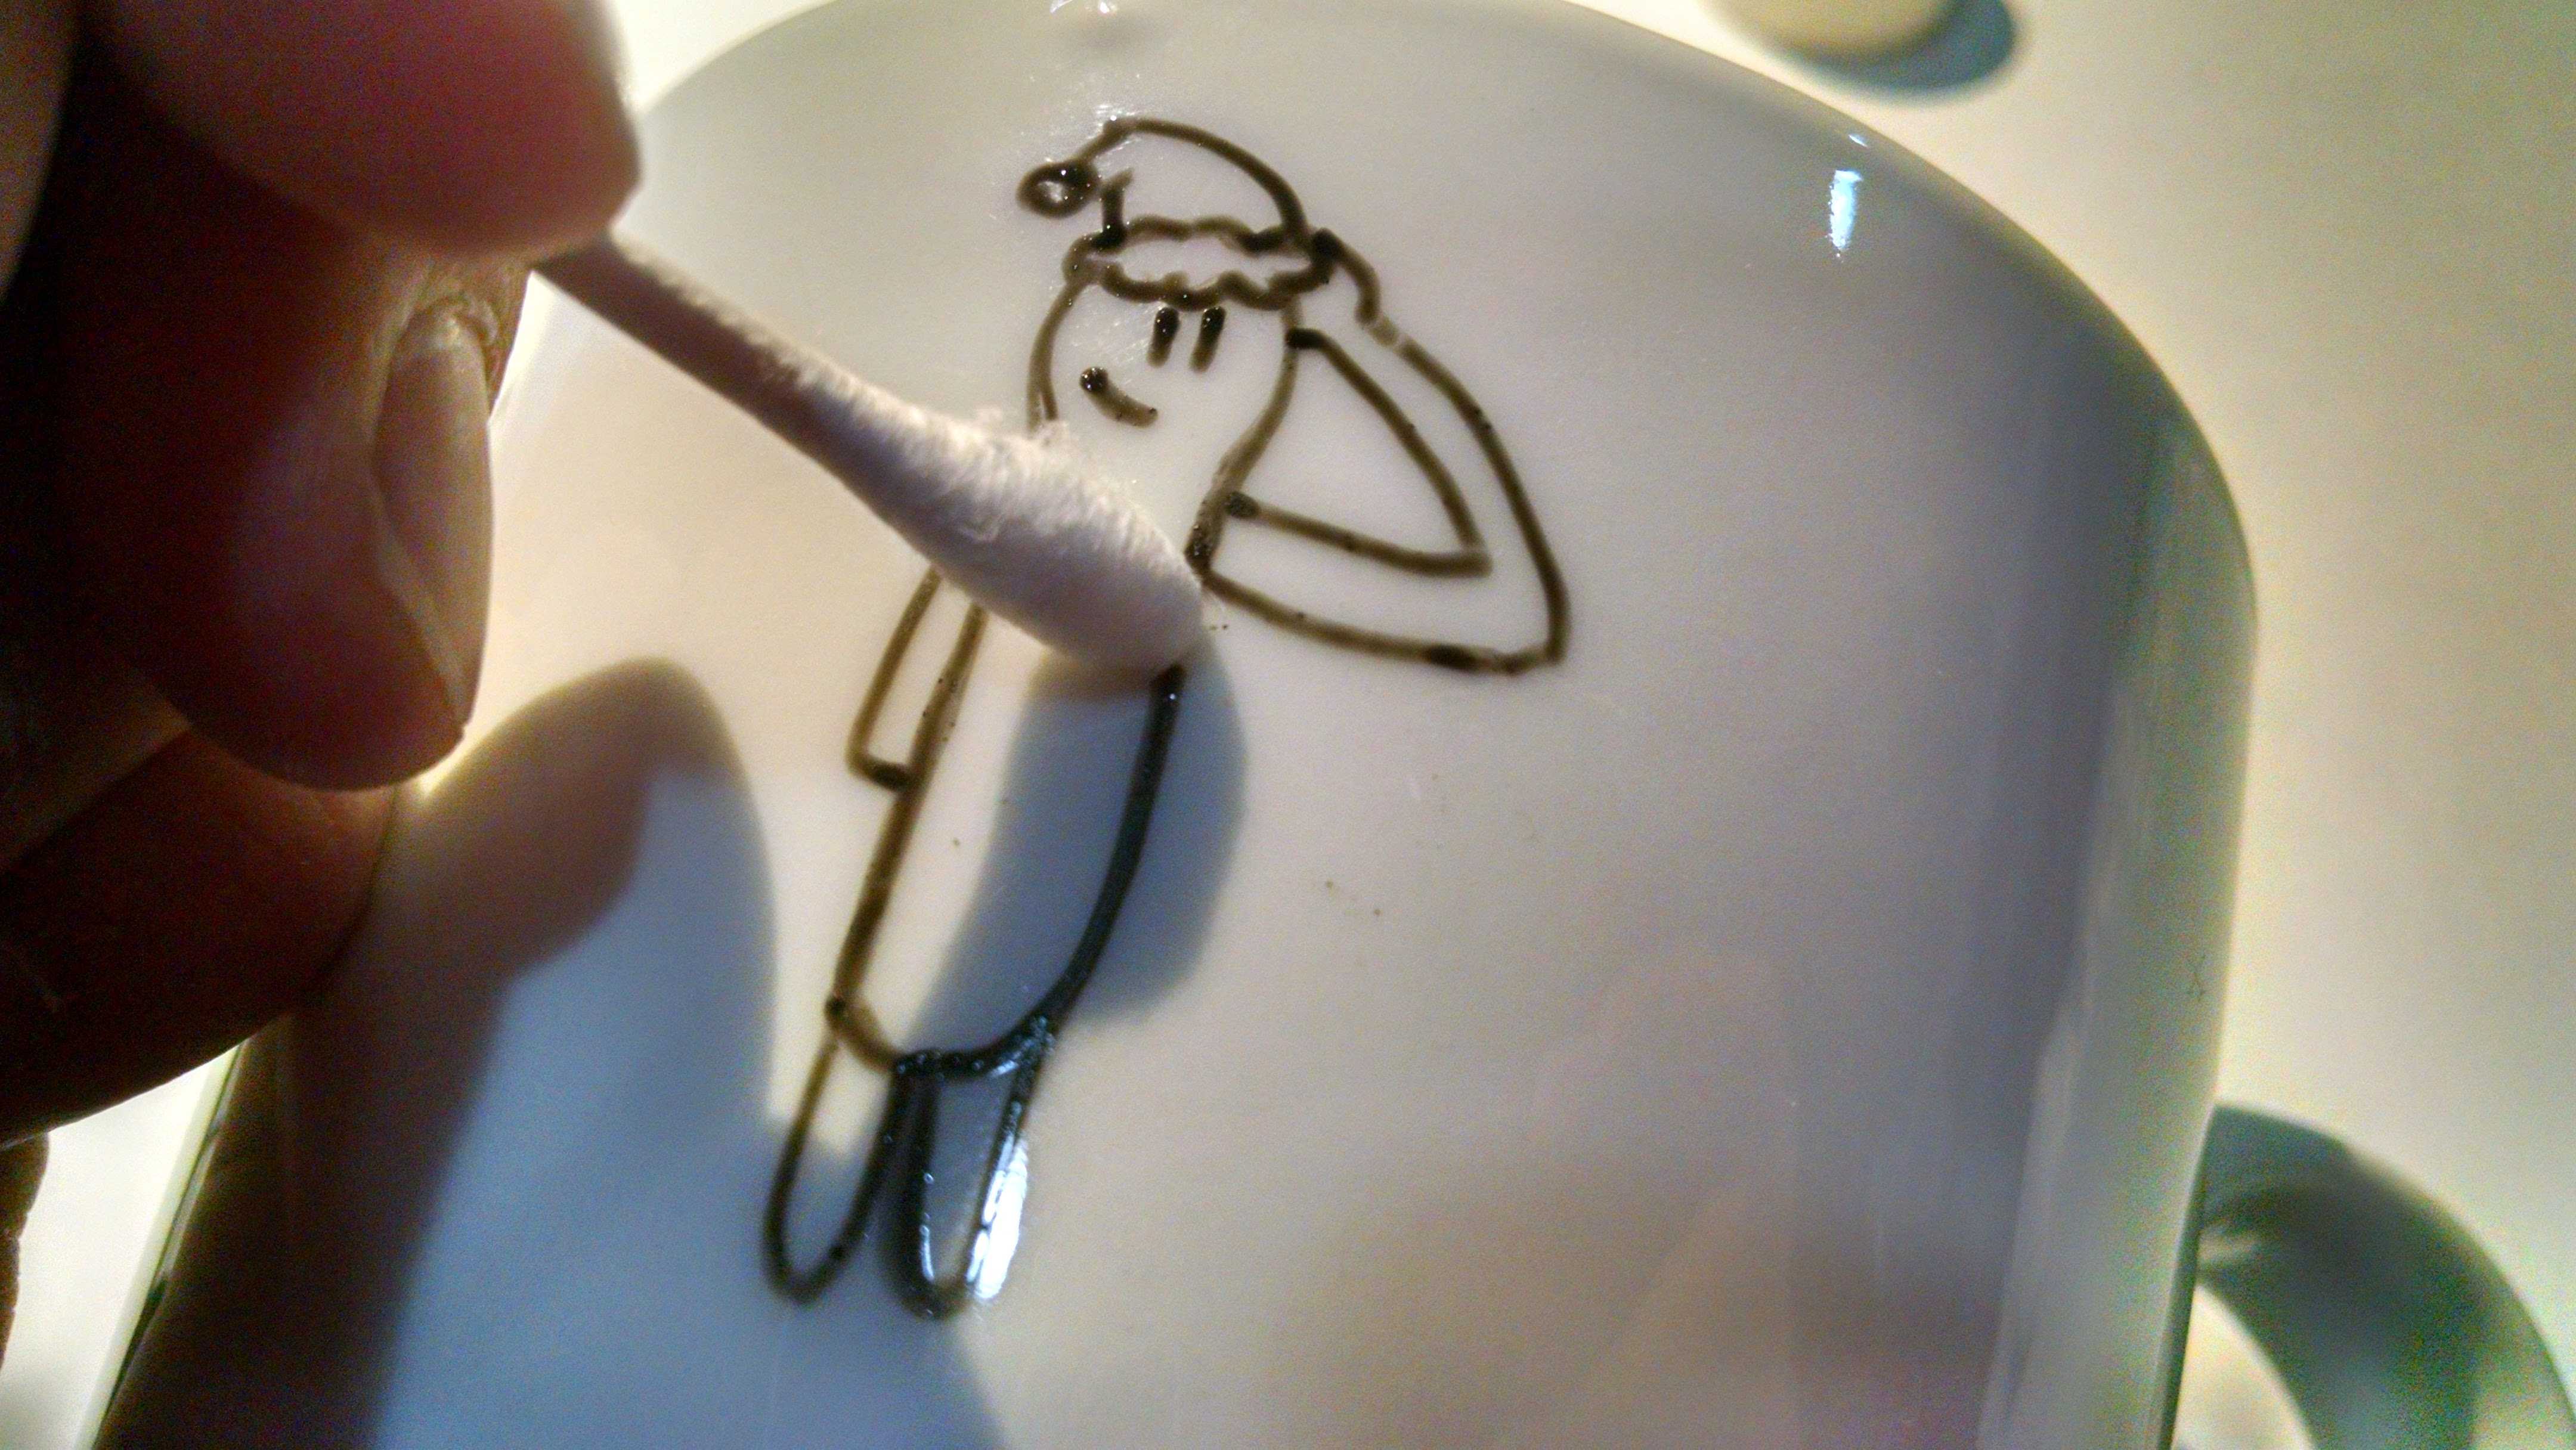
If you need to erase, let the ink dry and wipe with a Q-tip or cotton pad dipped in rubbing alcohol. Be patient with drawing and mistakes. Don’t reuse Q-tips; the cotton will wear out. Then let the rubbing alcohol dry before you start drawing again.
I recommend drawing with thin pens and coloring with broad ones, but it really depends on your design. Here is the finished drawing that I just began to color: Here is the finished artwork. If your design looks like it’s lacking something, try adding polka dots or a border around the top.
You can spruce up the handles too; I like to write the recipient’s initials there. Be careful about putting ink near the rim though, and DON’T draw on the inside of the mug. The paint is safe, but it doesn’t belong in someone’s drink.
Have fun with your designs, and good luck creating gifts this holiday!